Showing posts with label Gifts. Show all posts

Tuesday, June 28, 2011

End of Year Teacher Gifts


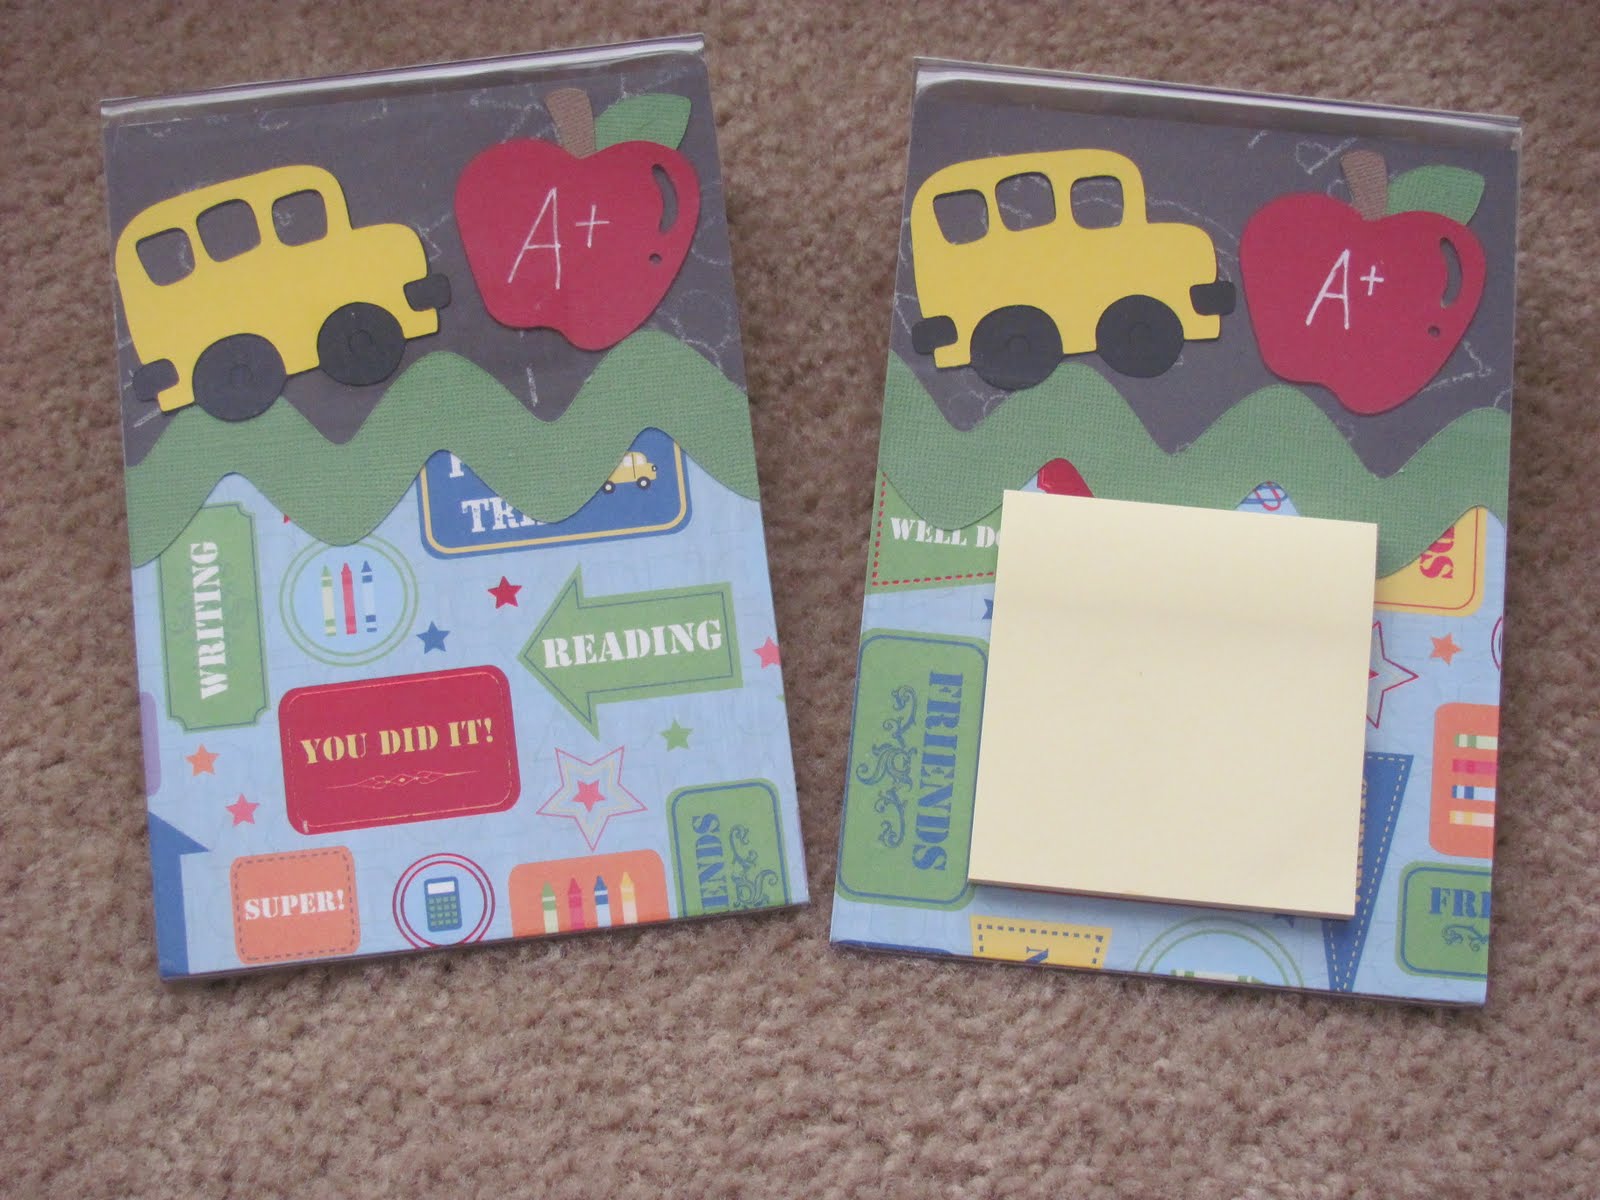
Hi friends!! Here is a teacher gift that I made for my kids to give to their teachers. I know it seems like it is late but they go to school all year round so their last day of school isn't until this Thursday. I saw this idea on the old Cricut Messageboard. It is so easy and simple to make. All you have to do is buy some acrylic picture frames. I found a few at the Dollar Tree. Scrap a 5 x 7 piece of paper and slide it into the frame. The paper is from the Grade School stack from DCWV. The zig zag is cut from the Plantin Schoolbook cartridge at 1 1/2". I did have to trim it down some as it was bigger than what I needed. The green card stock is golf course from coredinations. The apple and bus is from the Doodlecharms cartridge. I cut them at 2". The bottom part is a 2" x 5" strip of paper. I added the letters using the Roly Poly feature of the Plantin Schoolbook cartridge. They were cut at 1 1/2". I added some faux stitching and then glued it to the outside of the bottom. I did that because the stickers didn't want to come completely off. I tried just about everything to get all the sticky stuff off. Just slap some post it notes onto the top of the frame and there you go!! I'd love to hear what you've done for teachers! Have a great day!!

Hugs,

Stephanie


Friday, June 17, 2011

Father's Day gift


Hi friends!! Today I have a gift that my daycare kids helped put together for their Dad for Father's Day. I cut out the frame using my Cricut. I used Design Studio and the Keystone cartridge to weld together the letters. I used recycled cereal boxes for the frame. I cut out all the letters separately too. The children glued the letters down to the frame. They wrote on their tag and stars and then glued them down. No one wanted to try tying the ribbon so I did do that. I have also taped down some pictures inside the two D's of each of the children. I added some bent paperclips and taped them to the back to allow for it to stand up. I hope all the father's really like them! Have a great weekend!!


Hugs,


Stephanie

Saturday, February 26, 2011

Baby Mini-Album

Hi Friends! Here is a baby mini album that I made for a friend of mine. She had a little girl. I super love this pape that I bought from JoAnn's. The album is made from chipboard. The cover and pages come from myscrapchick.com. My friend didn't have a name picked out so I told her that once he decided, I'd put the baby's name on the front.

My Mom told me that I should make something to put on my crafts that said that it was homemade. So, here is what I made to put on the back.


I stickled a heart onto this clear tag that I had bought from Wal-Mart years ago! The pocket that the tags are in is a flattened toilet paper tube covered with scrapbook paper. The tags pull out and are great for adding journaling or more pictures. I inked the edges of the album.


The butterfly is cut using New Arrival cartridge.


I just love lavendar and green together!!! The hearts comes from George cart.


I love this duckie paper. I made some diaper invitations once when I helped with a duckie themed baby shower. All of the cuts are from the New Arrival cartridge. I ran the duckie through my paper crimper.


I made this fold out to display some pictures and tags. Embossed the It's a Girl box using my Cuttlebug. The baby rattle again comes from the New Arrival.


Here it is folded and tied shut with some ribbon. Made the flower on the opposite page with the Cricut. I think that the flower is from George cart but not to sure. Added a crystal gem to the center for some sparkle.


The BABY squares were cut using the George cartridge. It is the signs with the sticks cut off. I glittered them for sparkle!


I seperated the two pages into quadrants using the white rick rack. Used the buttons to add a final end to the rick rack. I stamped the heandprints and the cutie pie circle. Pop dotted them to add interest. You can hardly see it but on the right page at the very top square is a cut out of a stork. It is a cut from New Arrival.

I wanted to add a little bit of blue somewhere in the album. I embossed these with the cuttlebug. Precious and the flower came from Plantin Schoolbook. Added a little bit of blue ribbon to tie the two pages together.


I made the envelope from (I think) Tags, Bags, Boxes and More cart. I added a gift card in the envelope for the parents to be to buy something that they needed and didn't have yet. The footprints are from New Arrival.
It was so much fun putting this together. I am going to work on another baby album for another friend who is expecting a boy. I'll post pictures when I am done.
Have a safe and enjoyable weekend!
Hugs,
Stephanie


Monday, December 27, 2010

Christmas Gift Box


Here is a gift box that I made for my Grandma to put gift certificates to McDonald's in. She loves to go to McD's and get their lattes. (I'm not much for anything other than hot chocolate.) I used Tags, Bags, Boxes and More cartridge to cut this out. It is the crayon box. The paper is from My Minds Eye. It was super easy to put together! I slid the gift certificates in and then tied a ribbon around the box. I used the winter faces cut file from MyScrapChick.com for the tag. I think the tag was cut from Tags, Bags, Boxes and more as well. (I don't have a size for you. I am super bad at just making the item and then realizing, "Oh I need measurements for my blog." I'm going to try to make a better effort in the New Year to do that. I used Design Studio and measured the box and the gift certificates and just made sure that I had enough room to put them in and be able to close the lid.) I added a little detail such as the eyes and mouth. Not sure if I chalked the cheeks but on my Christmas cards, I did. Attached the tag to the ribbon and there was her gift. Hope you enjoy looking at it. I loved it.

Hugs,

Stephanie

Thursday, December 23, 2010

Christmas Candy Box


Hello again friends! I thought I should update my blog today with all the projects I've worked on so far. I guess it might be a little bit late for anyone to grab any ideas but maybe you could tuck them away for next year! ;) Here are some gift boxes that I made using a SVG file. It comes from MyScrapChick.com. (Have I mentioned that it is my favorite site to go to? And no, I don't get paid to say that or do I work with their design team although I think it would be AWESOME!!) I used My Minds Eye paper from the Sweet Dreams Holiday Avenue. The SVG is called pieboxwindow. I sized it to fit as big as possible on the page. I bought some transparency paper and used that for the window. The circles that are cut out from the box, I used as tags. I made some peppermint bark and placed in a bag and tied with a ribbon. I then tied the entire box with another ribbon. I made these to give to my kids teachers for small gifts for Christmas. I also placed a couple of them in the center of a plate of cookies.


Here is the recipe for the peppermint bark. It is SO EASY and YUMMY!!! It has become a favorite by everyone!!!


2 bags of Vanilla flavored Candy Wafers. (I bought mine from my local craft store. I also used the plain white wafers.)

10 candy canes


Crush the candy canes up in a ziploc bag. Reserve 1/4 cup to sprinkle on top. I melted the wafers in my microwave. I push time defrost so that the chocolate doesn't burn. I do 30 seconds at a time and then stir it up. Once it is all melted, I add the crushed candy canes. I line a baking sheet with wax paper and then pour the candy onto the baking sheet. I then sprinkle the 1/4 cup of candy canes on top. I place mine in the fridge to set for 10-15 min. Then you just break up into pieces however big you want.


That is it!! So Easy and everyone LOVES them!!!

Enjoy!

Hugs,

Stephanie