Showing posts with label Scrapbook Layouts. Show all posts

Wednesday, February 16, 2011

LID Challenge for this week


Hi Friends! I have completed the LID Challenge for this week over at the Cricut Messageboard. I decided to scrap some pictures of my youngest daughter putting together our first ever try at a Gingerbread house! I didn't make the house (although I'd like to give it a whirl one day) and instead bought it at A.C. Moore when it was on sale!! I used some paper from a paper pad that I had bought. It comes from DCWV - the Ultimate Premium Stack. It is really cool! It has all the seasons and holidays in it. There are 120 sheets in the stack! So, I used two kinds of Christmas paper since these were taken just before Christmas. I added a Gingerbread house and a gingerbread with a bowl on it's head from a cut file at MyScrapChick.com. I enlarged the images to about 2" for the front of the house. When everything is put together it measures about 3". All of the paper I used for the embellishments came from scraps! I just had to stickle the snow!! For the journaling, I used a ruler and measure and made my own lines. I really need to get some better way of journaling! Maybe some stamps. I added some ribbon that came from JoAnn's. I didn't add a title because what I'd like to add is bigger than the space so not sure if I'll leave it or add one. I'd love to hear how everyone else does their journaling, so leave me a comment! Until next time,

Hugs,

Stephanie

Friday, February 4, 2011

LID Challenge for the week


Happy Friday Y'all!!! This is a LID challenge for this coming up week over at the Cricut Messageboard. I was so excited to get started on it as I haven't been able to play along because my children and I have been sick for about 2 weeks now. The pictures are from the dozen of roses my husband sent me for my birthday back in December. I thought that this sketch would be perfect for these pictures. The paper is open stock from JoAnn's. It is called Confetti and Daisies and Daisy Stripes from Sandylion Sticker Designs. The title was cut at 3 1/2 inches using Sweet Treats cartridge. I used some scrap brown and pink paper for the title. Surprise was cut using Plantin Schoolbook at 1 inches. The tag is also from the Sweet Treats cartridge as well. It is cut at 1 1/2 inches. The ribbon is just some brown picked up from Wal-Mart a long time ago. Buttons and gems are from my stash. Hope you have a wonderful weekend!!


Hugs,
Stephanie

Tuesday, January 18, 2011

GLAMOUR GIRL LAYOUT


This layout was made for the LID challenge for the week of 1/13 - 1/19/10 over at the Cricut Messageboard. I really loved this sketch because it had a bunch of pictures to use. I tend to take a ton of pictures and it is hard to get them all onto a layout. It doesn't give much room for embellishing but that is okay. Capturing the pictures is the most important part. These pictures are from when my daughter went with her friend next door for her birthday to get their hair and nails done. It was her first experience having her hair and nails done by someone other than Mom or Grandma. It doesn't look like she had much fun but did. All of the pictures are sized at 3.75" x 3.75" except for the cocked pictures. They are 4" x 4". I matted the cocked pictures to help them stand out a little bit more. I didn't cut them at a particular size just made it a tad bigger than the picture. The scalloped rectangle is from svgcuts.com. It is sized to a little over 3.5" x 7". The title is Tangerine font. It is about 1 1/2" tall. The "GLAMOUR" is all in caps but "gIRL" is done with a lowercase g. The O is the inside circle to the cut out O. I added a button to add a little pizazz. The embellishments such as the purse, comb, mirror and nail polish comes from an SVG file from MyScrapChick.com. I used Make The Cut to size them for the title area and the nail polish for the area beside the picture. I stickled the purple nail polish and all of the hearts on the embellishments with Crystal Stickles. (That is my favorite color that I always turn to the most.) The flowers are something from my stash. Not sure where I picked them up from. I added some circle gems to the centers. The paper is all stuff that has been in my stash for a long time. I was going through my paper, wanted some bright colors and thought that the brightly colored flowers would fit. I hand drew with my black ZIG marker the lines for the journaling. I probably will use the Pure Pink ZIG marker to journal with. All I need to do now is add the journaling! Thanks for taking a look!
Hugs,

Stephanie

Tuesday, January 11, 2011

ALL STARS


It has been a Terrific Tuesday!! This is a picture of my daughter at her All-Star softball game this last summer. It was EXTREMELY hot that day. The temps were over 100. Poor things! They tried their hardest but lost both of their games. It was a good experience for her all in all though. I loved these two pictures and so I wanted to put them together. I used the negative of the star that I had cut out from a previous page. I laid it over the one picture and thought this would make a cute frame. I faux stitched the edge of the frame with a black ZIG marker. The tag was prebought from Wal-mart from years ago before I had my Cricut. I was going through some stuff and decided that I needed to use some things up and went to this tag for this page. I hand wrote All Stars 2010 using the same ZIG marker. Then put a star embellishment on to add to the empty space of the tag. I did ink the edges of the tag as well in Navy blue ink. Their team colors were Navy blue, yellow and white. I then attached the tag with some twine and then glued the whole picture and tag down to the grassy page. I don't know about you but I am finding it very difficult to find different kinds of softball themed paper. I either use the grass or their team colors. If anyone knows of where I can find some different papers, please let me know. The picture of her batting is matted onto white yardstick. Then all of it is glued down to some Navy card stock.
Thanks for taking a look.
Hugs,
Stephanie

Christmas Layout


Here is a Christmas layout that I did with my kids in front of our Christmas tree on Christmas. I used a layout sketch from myscrapchick. It was one of their freebie's one week. I didn't use the cuts that they provided but just the idea. The paper is from a paper pad that I had received as a Christmas gift. It is from Snowy Days by Recollections. It has some super cute patterned paper in the stack. The red stripe going down the side and the trees are preprinted on the paper. I cut a mat from some of the coordinating striped paper that was in the pack. The green ribbon came from my stash. I believe that it was some ribbon that was on a gift package that I had saved from another Christmas. I like to save ribbon and things that I receive and then reuse them in my projects. The title was typed in Make The Cut using Script MT bold as the font. I joined the letters together. I used some green and white dotted paper that happened to be in my scrap stash. I really need to go through my scraps and use of them on my projects. That is it. Simple!
I plan on getting busy with some Valentine's projects so I'd love to hear what you will be doing for Valentine's.
Hugs,
stephanie

Softball Layout


Happy Scrapping Friends! I have been a busy beaver today. I am trying to catch on some scrapping. I have just about finished all the layouts from softball season. It won't be to much longer and softball will be starting again. I love this layout because of the different pictures that I took. I used Make the Cut to cut the scalloped circle. It was enlarged to about 8 inches. I'm sorry but I can't remember where I picked this up at. I got this before I started my blog and now I want to give credit where credit is due. Sorry! The title was created in Make The Cut using Tangerine font. It is about 1 1/2 inches high. The strips of paper was some that I had laying around. I edged the blue with some scalloped scissors. The star was cut using George Cricut cartridge. It is the star2. Not sure how big it is because I had cut it for an earlier layout but didn't use it. I really hate this yellow paper because it doesn't cut cleanly with the cricut. It doesn't matter how I turn the paper, it still doesn't cut smoothly. The button is just one from my stash that I had picked up along the way. I used twine to run through the holes and tie in a knot. Thanks for taking a look!
Hugs,
Stephanie

ALL STAR LAYOUT


This is another layout from the LID challenge sketch from over at the Cricut Messageboard. The sketch is from PageMaps.com. These are pictures from the All Star team tournament that my daughter was on last season. It was so hot that day! It was over 100 degrees. I thought I would use this sketch as I had a ton of pictures from the day and wanted to use most of them. The navy blue paper is called midnight. I picked it up from my local craft store. The green grass also came from the craft store in single sheets. I faux stitched around the grass with a Reminisce white gel pen. The star with the title is cut using George and Basic Shapes cartridge. It is star2. I just love this star. I usually go to this star whenever I want to use stars on my projects. The yellow star was cut at 3 1/2", the blue at 3 1/4" and the white is 3". The little blue star is 1 1/2" and faux stitched with the white gel pen. The journaling star was cut out at 6", 5 3/4", and 5 1/2". I faux stitched around the inside of the white star using my double sided ZIG marker in black. I added journaling and pop dotted it onto the page. I faux stitched around the white card stock to make it look somewhat like I had sewn it onto the paper. The 4 star brads came from my stash of brads. I am not sure where they were bought from.


Happy Crafting friends!


Hugs,


Stephanie


LID Challenge for this week


Happy Crafting friends! We woke up this morning to a little bit of snow and a lot of ice on the ground. I don't have to work today so I am playing with my Cricut! Yay!! I used the LID Challenge sketch from the Cricut Messageboard. It is a sketch from PageMaps.com. I love their pages and like to play with them. I was looking through some of my photos and thought that the pictures from my daughter's softball team this year would be perfect. I used paper from my local craft store. All of the embellishments were cut using scraps in my scrap box. I did use the Baseball cartridge for all of the cuts on this layout. The big mitt is cut at 4". Play Ball! was cut at 2 1/2". The batters helmet, the base and the little mitt was cut using the Blackout feature at 1 1/2". I used a notebook paper for the journaling. I just was so proud of her this season! Hope you enjoyed my take on the challenge. Stay safe and warm everyone!
Hugs,
Stephanie


Monday, January 10, 2011

Let It Snow!


Hi family and friends! I have the perfect layout for you tonight. It is snowing and suppose to turn to freezing rain by tomorrow here in NC. I thought this would be great to post this layout that I made last week. The layout is from PageMaps.com. It is a two page layout. These pictures were taken the day after Christmas. It snowed here. We actually lost electricity that day. My two youngest kids were outside playing while my husband and I put together the trampoline my oldest daughter got for Christmas. They had so much fun throwing snowballs at each other. I used paper from DCWV. It is their Christmas/winter collection. The snowman and the title came from MyScrapchick. It comes from their Snowman collection. The snowman is the Mister Snowman. I used scrap card stock for the snowflakes, title and snowman. I stickled the center of the snowflakes. The ribbon was something left in my stash. I am not sure where it came from. It is pretty simple but I had a lot of pictures I wanted to put down on this layout.

I hope everyone stays warm wherever they are!
Hugs,
Stephanie

Saturday, August 14, 2010

Collecting Seashells by the Seashore


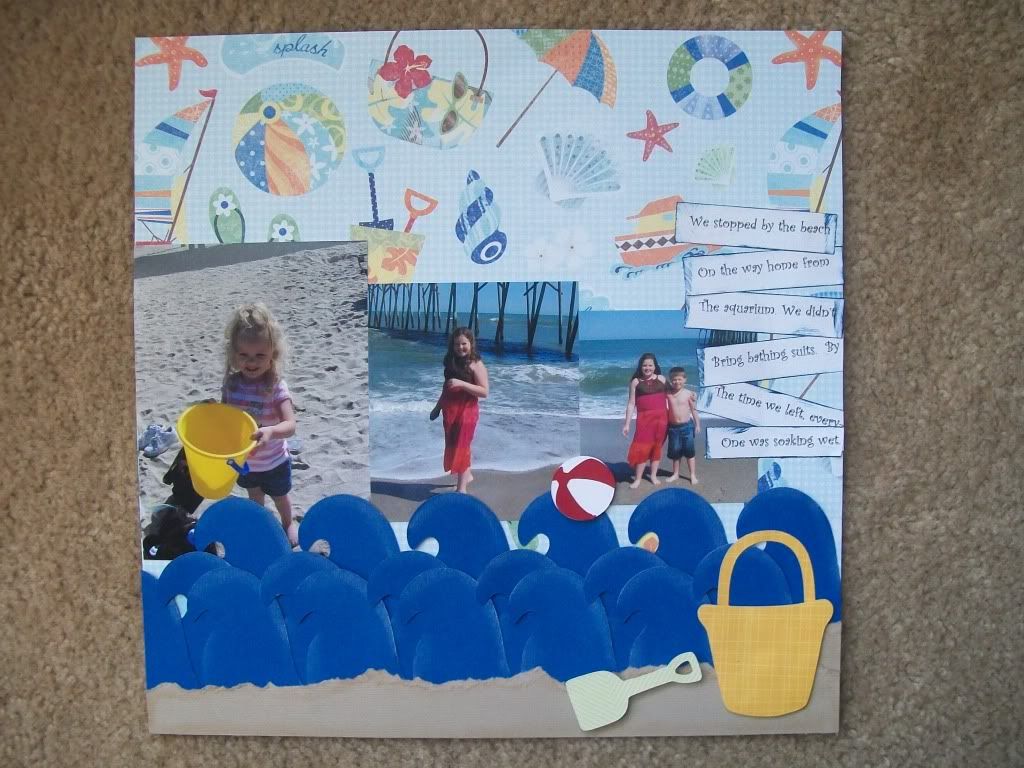
Hi friends! I have another layout that I did using the sketch from the Cricut messageboard for this week. These are pictures from last summer when we went to the aquarium. It was our first time going there. We stopped at the beach on the way home. We didn't pack and swimsuits because we didn't really know it was that close to the beach. I told the kids not to get their clothes wet because we didn't have anything else to change into. Well, needless to say, they all went home wet! :) It was a fun time! These are pictures of my youngest. She loved to play in the sand and collect the seashells. The paper is from a pack I bought along time ago when I first started scrpping. I didn't care much for it because it was really thin but I liked how the colors changed. The little stars and seashells are a svg file I got from Paper Scissors Ink blog. I inked the edges of all of them. For the title, I added the letters myself. Seashells and Seashore were cut using the font stoneage. It is about 1" high. The duck is from myscrapchick. I embossed the outfit with the swiss dots embossing folder. Thanks for looking and leave some feedback of what you think!
Hugs,


stephanie

Sunday, August 1, 2010

Just A Swingin!


Happy Sunday everyone! Today I have a layout I did of my daughter. She just learned to pump and keep swinging this summer. She loves to swing! It is kind of nice not to have to push her too! I used DCWV and My Mind's Eye for the patterned paper. The rest is card stock from the craft store. The background was cut using Make the Cut software. I cut a scalloped circle and used it on the "beautiful" layout. For this one, I used the negative side of the scallop and glued it to the white butterfly paper. I matted the middle picture with some green dotted paper from My Mind's Eye. "JUST A" was created using Make The Cut again cutting out from white card stock 1/2 inch size circles. I then stamped the letters onto each circle from some stamps my mom picked up for me. "Swingin" was cut again using Make The Cut software with Rockwell font at about 1 1/2 inches tall by 5 inches wide. It was cut as bold font too. I cut it out two times. Once with orange cardstock and one with black. I then glued the two letters together allowing part of the black to peep through to make it stand out a bit more. The bird, tree branch and girl all came from myscrapchick.com. I chalked the edges and popped the hands. The journaling was computer generated using Kids 4 Fun font. I cut each line apart and glued them down. Thanks for looking and enjoy the rest of your weekend!!


Hugs,


Stephanie

Saturday, July 31, 2010

All Grown Up Layout


Here is a layout I did about my daughter. I was surfing the net and found this blog called pencil lines. I entered this into their monthly challenge. I used their sketch #197. (I can't get the sketch to post so here is the link: www.pencillines.com/2010/07/sketch-197.html )


I took these pictures a couple weeks ago and was going through a pile I had just developed. I came across these and knew these were what I wanted to use for the layouts. She was "hangin out" with some friends in the backyard. I had my camera taking some pics and snapped a few of her. When I saw these, it made me realize how grown up she is. She will be starting middle school on Monday. I feel so old!! LOL A couple of days after these were taken, we were driving to the store and in conversation, I asked her why she didn't play with the younger girls in the neighborhood anymore. She basically told me that they play immature games. So, I titled the page "so grown up" because that is what she is becoming. The papers I used come from My Minds Eye. I did use Make The Cut software to cut the bracket. It came from myscrapchick.com. My software had closed before I could write all this down but I think it was cut at about 7 in wide by 8 1/2 in. tall. I faux stitched the edges. The green and blue polka dot paper is 2 1/2 in. x 8 in. I added some yellow buttons down the side to give the page a little pop of color. The striped paper was cut at 2 in x 8 1/2 in. I used a Martha Stewart punch to add a little bit of extra to the edges. The title was also cut using some black card scraps. It was cut with Make The Cut software using Script MT bold font at 1 inch high. The photos were cut down to 3 in. x 5 in. and 3 1/4 in. x 4 in. The 3 x 5 was matted using some floral paper from My Minds Eye too. The journaling was computer generated using Teen font. I then cut it out with decorative scissors and inked the paper. I added a few flowers from my stash and there you go! Thanks for looking and leave some feedback! I love to hear what you think.


Hugs,


Stephanie


Tuesday, July 27, 2010

Beautiful Layout


Hi everyone! Boy, I am on a roll this week! I have another layout for you. These are pictures of my youngest daughter. This would have to be my favorite layout. I just love these pictures too! I used a sketch from Scrapbook Sketches from Scrapiopath. I used Make The Cut for all of the cuts on the page. Paper is from DCWV - Flower Shower Spring Stack. I cut a scalloped circle at about 11 inches. The green frame came from myscrapchick.com. It is the 2 piece doodle frame. I just used the top frame. I enlarged the frame to 5 inches wide by 8.25 inches tall. The pictures in the frame are cut at 4 x 4". I used Make The Cut to cut the word beautiful. It is 1.5" x 4". I also stickled the title as well. The heart above the i is a sequin from my stash. The flowers are cut using yellow card stock. I used the Tags, Bags, Boxes and More cartridge and cut them at 2 inches. I have a stash of buttons that I added blue buttons to the centers. The journaling is Tangerine font and just printed off the printer. That about covers it.

Monday, July 26, 2010

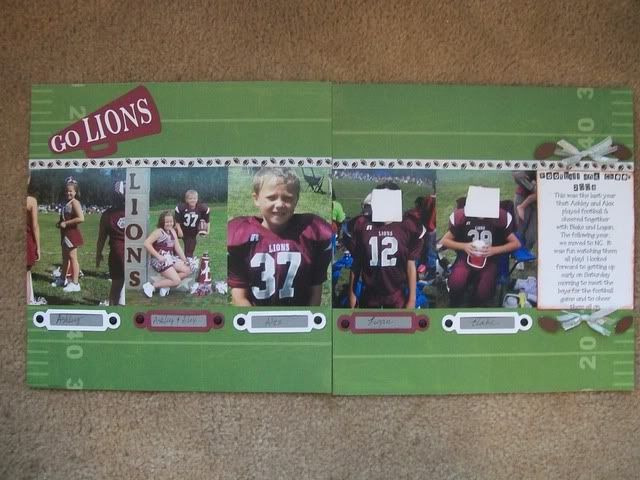
Football/Cheer Layout


Hi everyone! Here is another layout for the LID challenge over at Cricut.com on the messageboard. I chose pictures from 2008 football/cheerleading season. They are pictures of my two children and my two nephews who played that year. I started with paper from Colorbok - School Life. It is the football field paper. I first cut a megaphone from maroon Bazzill card paper. I cut it out a 6". The cutfile is from the MTC gallery. Next, I cut GO LIONS from white cardstock using MTC. Century Schoolbook font was used. The word "GO" was cut at 1/2" and the "LIONS" was cut at 1". I then used the Desgin Studio to cut the tags for under the photos. I used Tags, Bags, Boxes and More cartridge. I pushed the shift button, mirror/window button and lgcrc2-h button to cut out the tags. They were sized in DS at about 3 1/2" long and 3/4" tall when folded down. I then cut out a grey rectangle to fit under the window. I glued the grey cardstock to the tag and glued the window down to form the tag. I added some handwriting and attached them under the pictures with some black brads I had laying around from a long time ago. The football ribbon was also in my stash. Above the journaling, I used footballs cut out from the football svg file from treasureboxdesigns. It was cut at about 1" long. I then cut white and silver ribbon at 3" in length and tied them together. I just attached them to the top and bottom of the journaling. The journaling was done on my computer. For the title, I used Earwig Factory. I think this is a really fun font to play with. The rest of the journaling was done in Tinker Toy. I inked the edges too. That about sums it up. Thanks for checking out my blog and have a great day!!!


Hugs,


Stephanie

Beach Layout


****I can't figure how to get the 2 page layouts to show up without chopping half of it off so if you click on the image, it will show you a close up. *****


Yesterday, I finished a 2 page layout from the Cricut Messageboard for this weeks LID Challenge. I used Tropical Treasures svg file from myscrapchick to cut the sun, the beach balls, the waves and the shovel and pail. For the sun, I cut it at about 4" - I think. I chalked the edges and faux stitched it with a black pen. For the center of the sun, I ran it through my printer using Tangerine font and then popped it. The beach balls were cut at about 1" and just glued together. I duplicated the wave and welded them together to get a line of them. I cut them at about 3" and then chalked them with white chalk. I tore a border of tan paper to represent the sand. I also chalked it with a little bit of brown. I'm not sure the size of the shovel and pail but it was cut and popped too. The journaling (which I am not to fond of) was just printed in Word using Curlz MT font. I cut the lines apart, inked with blue ink and staggered them some. The paper is from Happy Trails Beach Toss. Thanks for looking and would like to hear what you think!!


Hugs,


Stephanie

Sunday, July 25, 2010

Aquarium Layout


Hi everyone! Hope you are staying cool this weekend! We were out in the 100 and some degree weather yesterday. My oldest daughter had softball tournaments Friday and yesterday. They won their game Friday and then lost two games yesterday. I think the heat worked a toll on them. It was fun needless to say. Today, I have a two page layout I did from when we went to the aquarium last summer. I love the fish paper from Cosmo Cricket called Snorkel: School's out. The purple mats for the photos came from DCWV Flower Shower Spring Stack. The rest of the paper was scraps laying around that I wanted to use up. I used the Sea Treasures svg file from myscrapchick for the fish, the seaweed, starfish and the snorkel boy. I chalked the edges of the cuts. The water was cut from card stock using the Creative Memories wavy cutting system. It was the first time I had used it. I had a hard time for some reason. It didn't want to cut all the way through the paper. It probably was just me though. Anyways, hope you enjoyed it as much as I enjoyed putting it together. Enjoy the rest of the weekend and stay cool! :)


Hugs,


Stephanie
Sunday, July 18, 2010

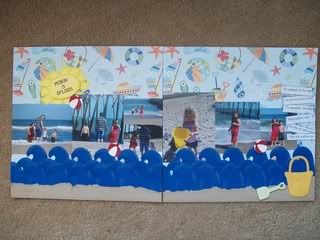
Frosty Fun!


Hi again! I have been on a roll this weekend. I created this 2 page layout today and wanted to share! The snowman and the title is from the snowman collection at myscrapchick.com. I just love their paper piecings! You can't see it well, but I did stickle the snowballs and the fun in the title. Stickles is becoming my most favorite piece of scrapbooking must haves! I used paper that I had bought in a paper stack years ago at Wallie World. This was the first time that I have used it. It was so much fun to put together! I'd love to hear what ya think! Does anyone know how to get my pictures to post bigger? You can't see much detail and I'd like to be able to show the detail more.


Hugs,


Stephanie

Finished with the Wedding Album! :)


Hi everyone! If you have been following my blog, I have been working on an album from when my daughter was in a wedding. I finally finished it yesterday!! I am so excited and love how it all turned out! The two page layout is a LID challenge this week over on the Cricut Messageboard. This was my first time participating. I used Make the Cut and the wedding cart for the titles and all of the wedding themed embellishments. You can't see to well, but I stickled the cake and the wedding bells. Thanks for looking and I'd love to hear your feedback on my work and my blog!
Hugs,
Stephanie

Tuesday, July 13, 2010

More Wedding Layouts


Here are the last of the wedding pictures I have scrapped so far. I love the bride and groom. It was cut using Make The Cut with an SVG from myscrapchick. They turned out super cute!!! I left the groom bald as the groom was bald too! :) The titles were cut using Make the Cut with various fonts. Hope that this inspires you if you are looking for some ideas! Thanks for looking and I'm always eager to hear what you think!


Until next time,


Hugs,


Stephanie